Jef Lockyer explains how he made his very own Bell Target
I read about bell target shooting several years ago, when I returned to airguns after raising a family, decided it would be a fun challenge and determined one day to make a bell target. There is plenty of information on how to do this on the internet; a bell target shooting website at www.belltarget.com, where you will find information on the rules, leagues and plans for various types of bell target, and a comprehensive history of the sport and its origins in the Black Country. Living in the south-west it was not something I had heard of before, but I have since been told, but not yet confirmed, that it did happen in a few pubs in Bristol.
One attraction of bell target shooting is the short range of usually 6 yards, sometimes 7 yards. This fits in neatly with the UBC philosophy of shooting at home, where 6 yards is often easy to find in a back garden, or even indoors, so our competitions can be enjoyed by people without a local club or shooting range. We even run several vintage and open class competitions using a paper representation of the bell target.
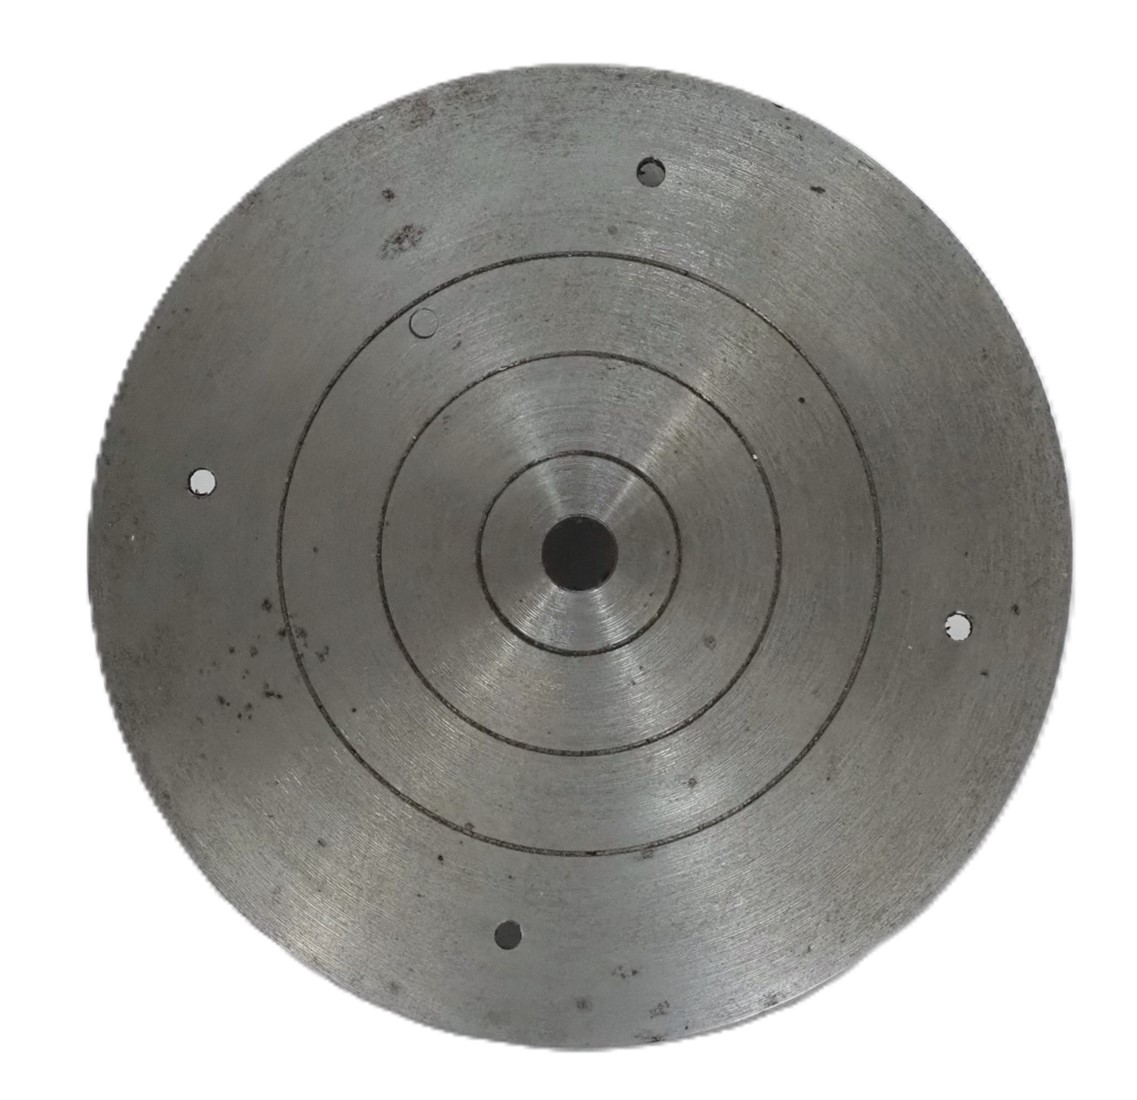 The face plate is probably the hardest part to source
FACE PLATE
I decided I’d have a go at making a target using available materials. The main visible feature of a bell target is the face plate with its 3/8” central hole and concentric rings at 1”, 2” and 3” diameter. Note the imperial measurements. It’s an old sport that predates the metric system in the UK, so I’m sticking with them. There is a drawing of the face plate available on the bell target website and I used this to give me the sizes for my version.
I picked up a large circle of ¼” steel plate from work many years ago, a blanking plate that came on the main oil connection of a large transformer, and once it was installed the plate was surplus and due for the scrap man. Apart from the circle of ¾” diameter holes around the periphery, it was just the job. I laboriously chain drilled out the required 5” diameter circle and machined it up on my lathe with the central hole and the concentric circles being machined after facing the rust pitted surface back to clean metal. The result wasn’t bad and the project was then shelved, pending a suitable bell.
THE BELL
Some years later, during a kitchen clear-out we found an old SodaStream CO2 cylinder. This didn’t fit our new SodaStream and couldn’t be exchanged either, at least not anywhere locally that I could find. After ensuring that it was empty, I attacked it with an angle grinder and cut it up into three pieces because I needed a 2” diameter tube for another project. The left-over bottom end seemed ideally suited for a bell.
The cylinder is quite thick, so would make a robust bell capable of surviving hits from full power sub-12 ft.lbs. rifles. After machining it up on the lathe, I rigged it up in my target box/pellet trap for a try out, to see if it was loud enough. At 20 yards, a pellet from the Katran gave a nice loud ring – it would do very nicely.
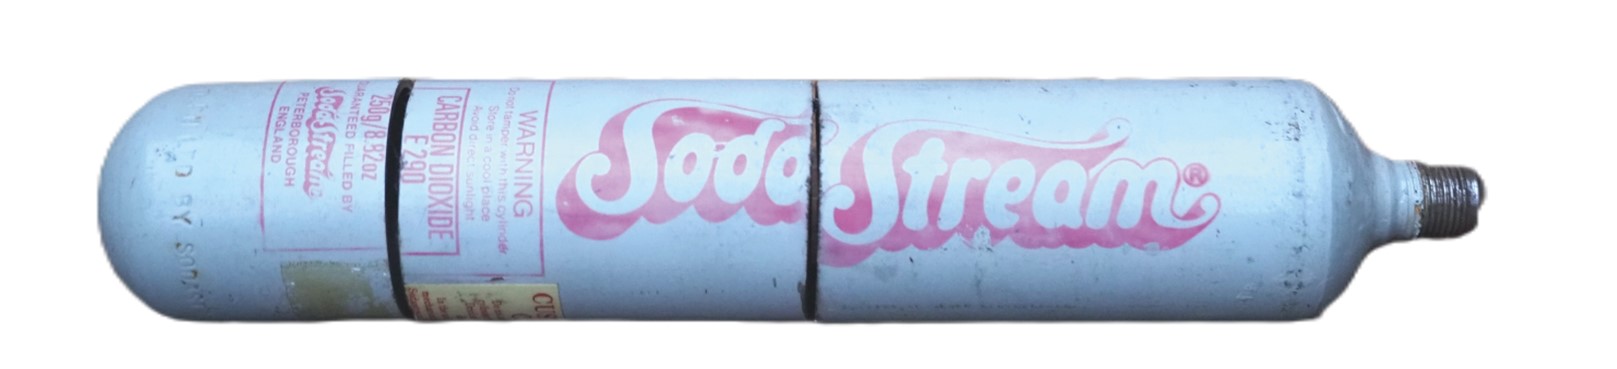 You can put an empty cylinder like this to make the bell
THE BOX
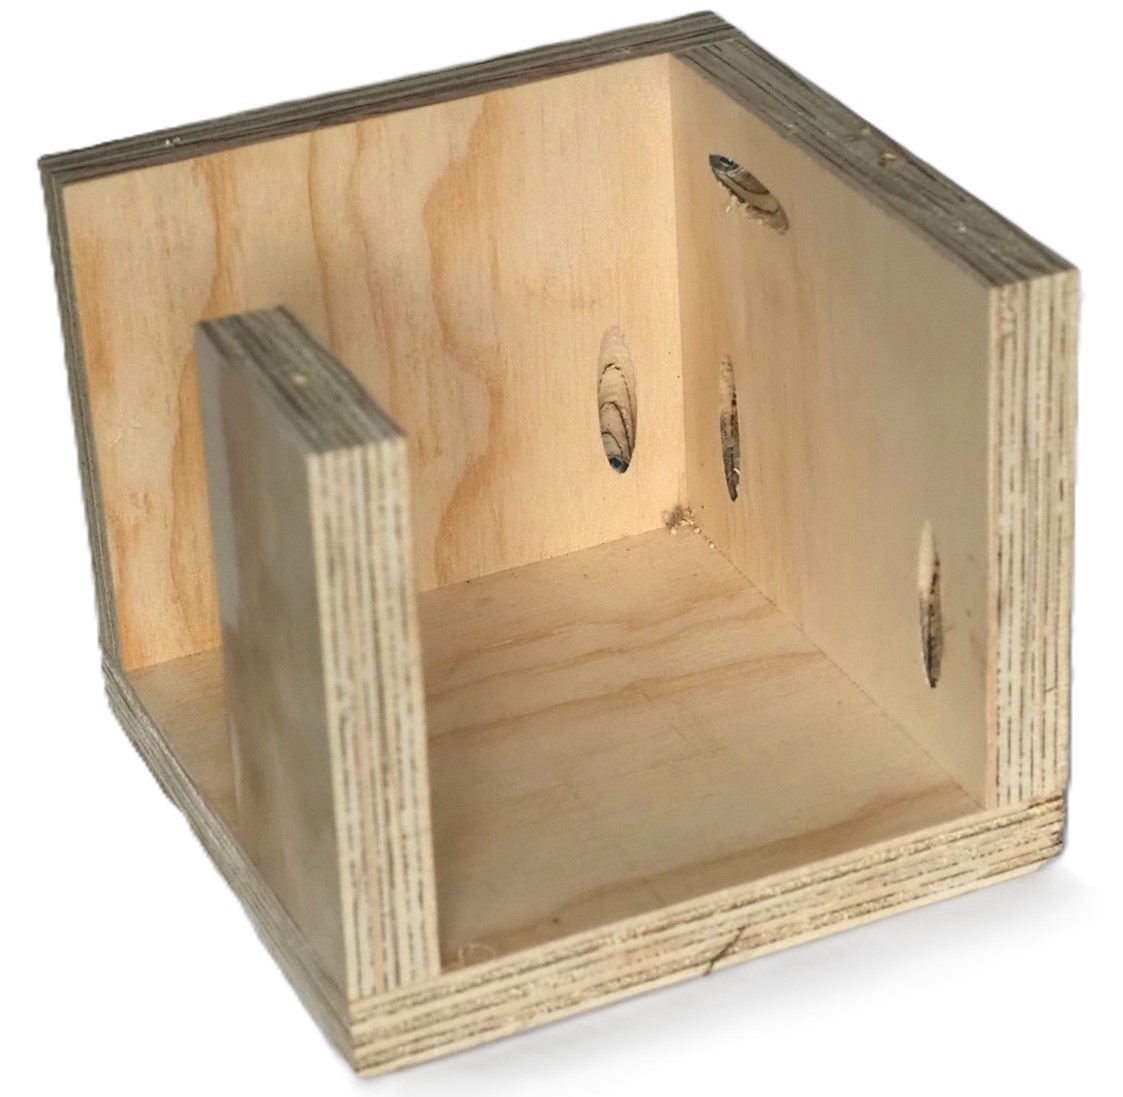 Constructing the box is fairly simple.
So now I had the face plate and a bell, I just need to find a way to mount them in the correct relative positions. During a visit to a certain large DIY store I spotted a bin of ply offcuts by the door. A donation to charity allowed you to take your pick There were a couple of nice pieces of 18mm ply that looked just enough for a 6” cube, so I bunged a quid in the box and helped myself to a couple of square feet of ply. A couple of hours in the shed and I had a 6” box with no front and a hole in the side to let out the sound of the bell.
Another piece of steel was liberated from the scrap bin at work, this time a 16swg steel sheet that had been a busbar cover on some low voltage switchgear in its previous life. This was cut to size to fit the front of the box. A few holes later and the face plate was securely bolted to the sheet, which simply screws onto the front of the box.
BELL HANGER
The bell testing with the Katran showed that simply hanging the bell loosely from a countersunk screw was all that was needed to allow it to ring clearly. I was a little concerned that just a wood screw screwed into the lid would ultimately work loose with constant hits – there’s optimism for you given my shooting abilities – so I designed a slightly more robust system, still based on hanging from a countersunk screw.
A 4mm, (we all have to go metric sometimes don’t we?) thread was cut in a short piece of 1” x 1/8” bar and this is screwed to the underside of the lid of the box just off centre. This will deflect the pellets to the right-hand, closed side of the box and not out through the sound hole. An M4 machine screw is passed through the bell and lock-nutted to this plate leaving the bell loose on the screw.
The top and front were screwed onto the box and gave a nice neat and tidy finished bell target. Total outlay was £1 (to charity) for the plywood, the screws and other bits were found in the shed. So there we have it, a bell target with a very low carbon footprint and very kind to my wallet.
It just needed to be tried out now. The neat and compact 6-inch cube is easy to store and can be easily transported to your local club or range. It will fit on a simple shelf or could be hung from a screw or nail if a mirror plate were screwed to the back of the box.
In use, the faceplate was traditionally painted with a non-drying paint made from white powder paint and castor oil. This was touched up after each shooter’s score had been recorded, so everyone had a go at a clean target. Getting hold of white paint powder locally proved quite difficult and I had to order some in, so I have not yet tried this out.
 Give it a test and make sure it rings
RESULT!
At 20 yards with the Katran, shooting off a bipod, I got a ring on the third hit – well, it was a bit windy, honest! It rang quite clearly despite the enclosing box, and the missing half side let enough sound out to be heard easily 20 yards away. The use of 18mm ply also gave enough weight to keep the box still, even when being thumped by pellets leaving the rifle at over 11 ft.lbs. I think I will need to sort out a suitable rifle for use at the normal 6-yard range, though, because the shrapnel flying about from pellets hitting the faceplate was prodigious and could be dangerous at closer range. Usually, rifles developing around 6 ft.lbs. were used for this sport, so I think I will dig out one of my old Airsporters and cut the spring down to get it closer to 6 ft.lbs.
Overall, I am quite pleased with the result. It didn’t cost me a lot, used a few items that would otherwise have had to have been recycled and kept me out from under my wife’s feet for a few hours. I am looking forward to having a go with a lower-powered traditional spring rifle, and perhaps get a few mates round for a go, but colder weather settling in, that may have to wait a while.
www.umarexboysclub.co.uk

CAPS
1 The face plate is probably the hardest part to source.
2 CylYou can cut an empty cylinder like this to make the bell
3 And there it is, the base of a cylinder bell
4 Give it a test and make sure it rings.
5 Constructing the box is failry simple.
6 The front plate completes the box.
7 Now it’s time to hang the bell.
8 The finished bell box target!