Dave Barham continues his review of the rather versatile new HikMicro Cheetah Digital Day/Night Vision unit. Part 2.
Right off the bat I have to tell you just how impressed I am with this new Cheetah C32F-RL digital day/night-vision unit from HikMicro. I said in a previous issue that I was going to do a two-part series reviewing it, but having spent a month using the unit I’ve decided to extend the review to three parts! There’s just so much to cover, and I really want to show you just how good it is out in the field, so next time I’ll be giving you the low down on how it performs on a rabbit hunt. I spoke at length to the tech heads at HikMicro via a Teams meeting a few days ago, and they told me that they are now marketing the Cheetah specifically aimed at us airgunners, and with good reason – it’s perfect for us. It’s extremely lightweight, has a built-in IR torch and laser rangefinder, 4mp resolution image and video capture and a long run-time.
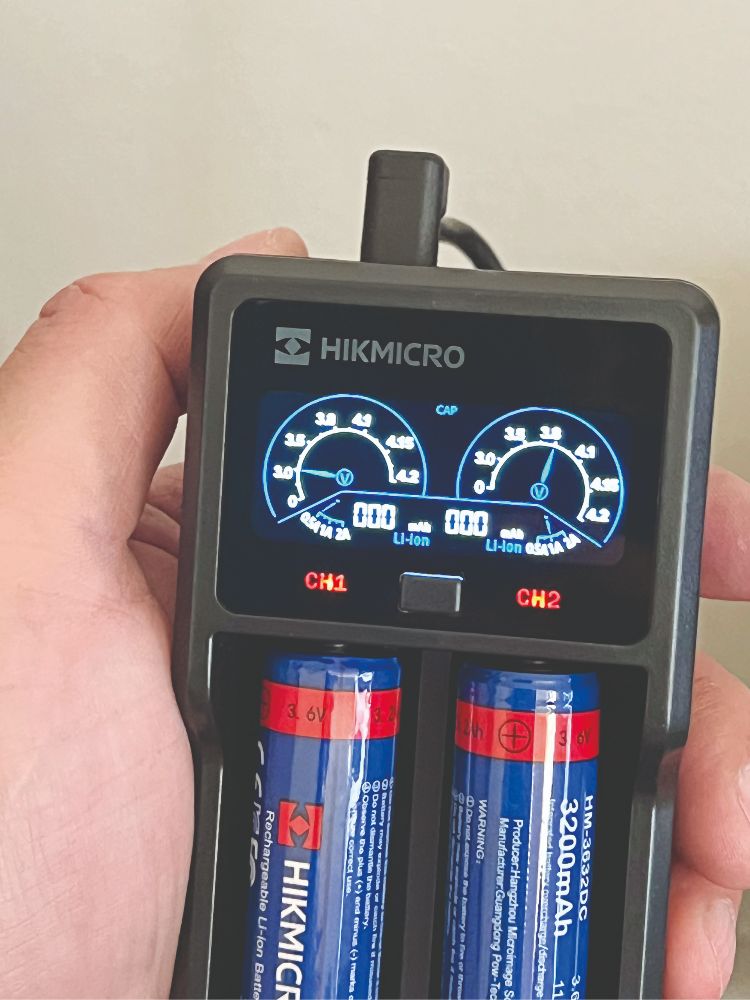 Pretty snazzy eh? I haven’t seen a battery charger like this before
GETTING CONNECTED
I’m going to be looking at how easy it is to get this little gem zeroed, along with all the different parameters you can choose.
All the menu options are accessed from a single button and dial found on the lefthand- side of the unit. You’ll notice from the picture that it says ‘PUSH’. With the unit powered on, simply press the ‘PUSH’ button and hold it for more than one second and up pops your menu screen. The first thing you have to do is connect the Cheetah to your smartphone. To do this, simply scroll down through the menu by twisting the rotating dial on the outside of the ‘PUSH’ button until you get to the ‘Network’ setting, then use the push button to toggle between ‘Hotspot’ and ‘Close’ – you want it to stay on ‘Hotspot’. Now open the app on your phone and follow the instructions, which are basically opening your internet settings on your phone, selecting the unit and then entering the password, which is the serial number of the unit. With your Cheetah unit paired to your phone you can now take photos and record video directly to your smartphone via the Cheetah unit – but that’s not all. You can also update the internal Firmware of the Cheetah via your phone – so there’s no need to connect the unit to a computer anymore!
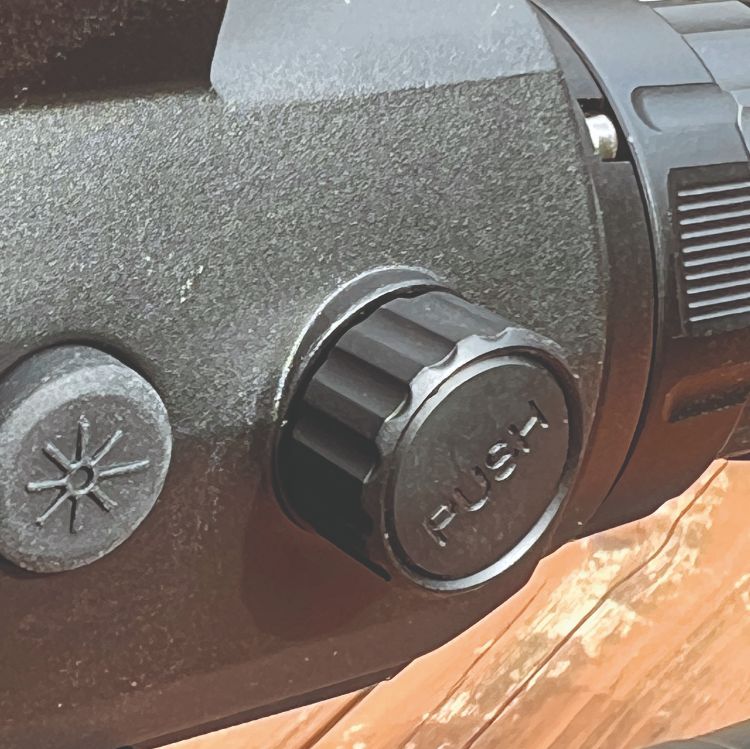 All the menu options are accessed via this ‘PUSH’ button and dial
MASTER THE MENUS
I love how easy it is to get the Cheetah zeroed, it really is child’s play. The first port of call is to used the ‘PUSH’ button to get into the main menu, then scroll down to ‘Reticle’ and press the button to enter the sub menu. At the top you’ll find ‘Reticle’ with a choice of five settings. These are your five different saveable settings. It’s really handy to have because you can set number 1 to say 30 metres (you can choose either metres or yards in the settings), then maybe Reticle 2 to 15 metres for barn ratting, and then ‘Reticle 3’ to 40 metres for longdistance rabbiting, and so on.
The next box down is where you set your distance. You can see here that I have mine set to 25 metres. Below that is the ‘Type’ menu. This allows you to scroll through five different reticle patterns, and I have opted for number 4, which is actually a first focal plane reticle with mil dot-type markings – these move as you increase the zoom, just like a traditional FFP scope. Underneath this is the ‘Colour’ selection, and there are seven to choose from, including White, Black, Red, Green, Blue, Yellow and Orange. Remember, you can save up to five custom settings with different distances, reticles and colours.
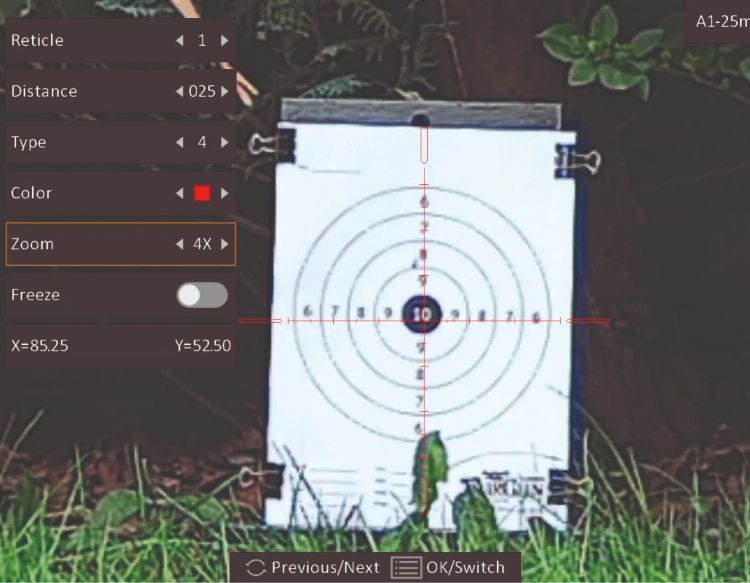 Get yourself into the ‘Reticle’ menu, choose 4x zoom and take a shot.
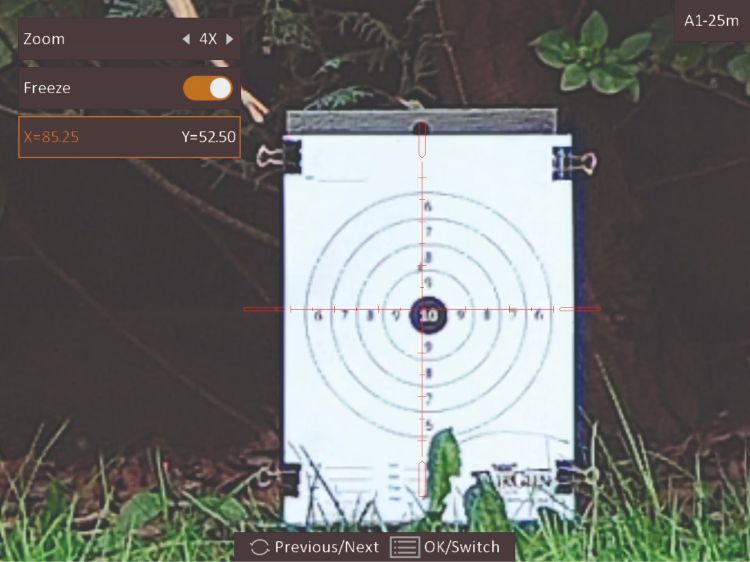
 With the frame ‘Frozen’, you can adjust the X – verticle axis to sit over the pellet hole.
 Save it and you’re done!
LET’S GET ZEROED
Okay, so you’ve set you distance, chosen your reticle and colour, now for the nitty gritty.
I actually started off this process as I normally do for all scopes, at 15 metres with an old cardboard box. I set a rough zero before going out to 25 metres on my proper target.
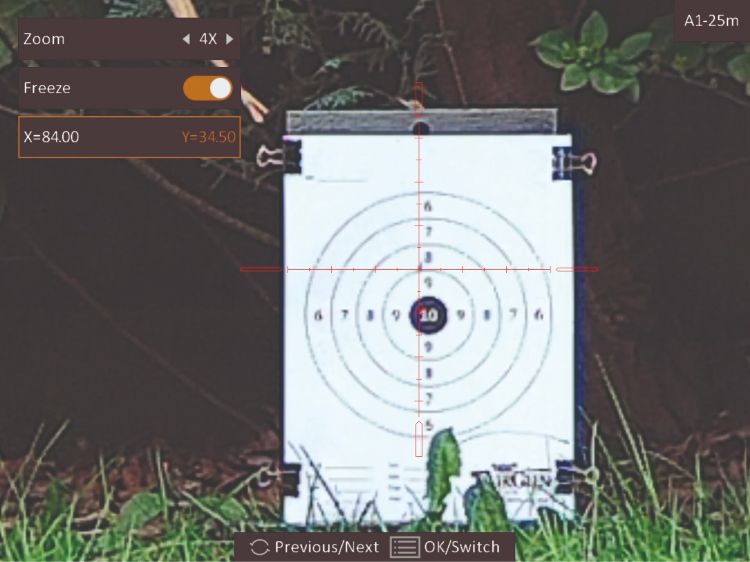
To set the zero you simply aim at the middle of your target, set your zoom range (I chose 4x) and take a shot. Note where the pellet lands within your target. Now scroll down another box in the menu to ‘Freeze’ and press the button to select it. This brings up another sub menu. Select your zoom range (again, I chose 4) then scroll down to the ‘Freeze’ option. Position the crosshair back onto the middle of the target and press the button to freeze the image in the viewfinder. It doesn’t matter if the rifle moves after this – you have a perfectly frozen image on your screen.
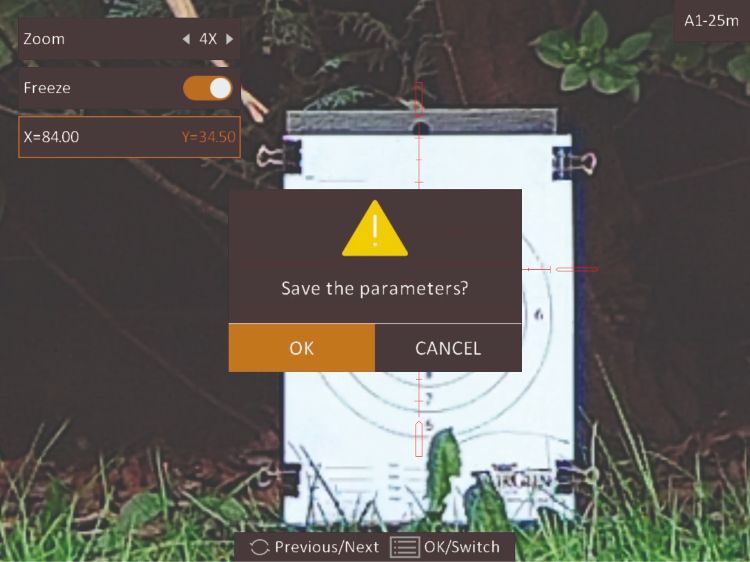
Twist the dial one more time to scroll down and press the button to select the X and Y axis controls. Now you can position the vertical line over your pellet marker, and do the same with the horizonal line so that the middle of the crosshair is over your pellet hole. Now press the button in for one second and up pops a message to save it all – your Cheetah is now zeroed and the reticle pops back into the middle of the screen, ready to go.
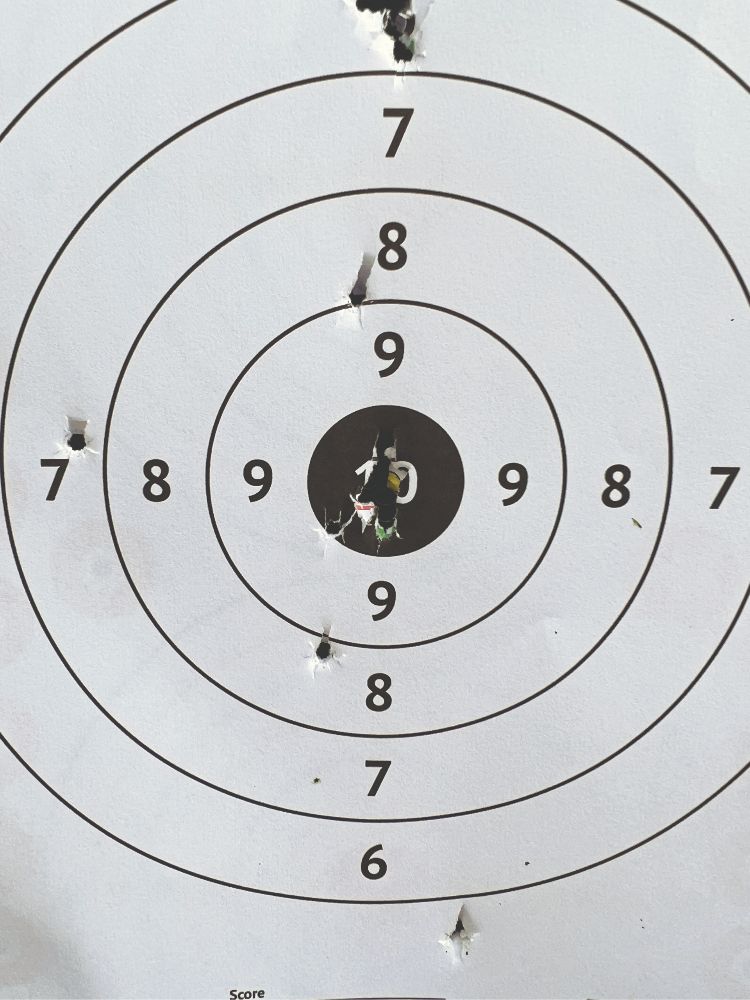 After a couple of zeroing shots it doesn’t come much better than that – especially with a .22!
You can see by the photo here that I took a few shots at target before getting it all spot on and then I put six shots into the middle of the target once zeroed – it’s absolutely foolproof and the range of adjustment is superb – long gone are the days of shims. If you find that the say the Y axis won’t move far enough in one go, you just move it as far as you can and save it, then go back in and repeat the process until you achieve zero.
READY TO GO
I can’t wait to get out hunting with this unit now that I have it zeroed. The picture quality in night mode is outstanding, and I hope to show you that in the concluding part of this review. I can’t sign off without showing you a photo of the battery charging unit – how cool is that! Everything about this HikMicro unit oozes quality.
Key specs
- Max Resolution: 2560 x 1440
- Frame Rate: 25Hz
- Lens: 32mm
- Aperture: F1.2
- Min Focus Distance: 3 metres
- FOV: 9.9 x 7.5 degrees
- Magnification: 1x
- Detection Range: 400 metres
- Eye Relief: 10mm
- Display: 1920 x 1080, 0.49-inch OLED
- Operating Temp: -30 to 55C
- RRP: 1034.99
- HikMicro